
Transitioning to Time Reports Pro
First of all, we want to say welcome and we’re glad you’ve decided to try out Time Reports Pro! Time Reports Pro has all of the great features of Time Reports, but even better!
This guide will walk you through transitioning to Time Reports Pro from Time Reports.
Step 1: Install Time Reports Pro
Step 2: Connect your Calendars via the Setup Wizard
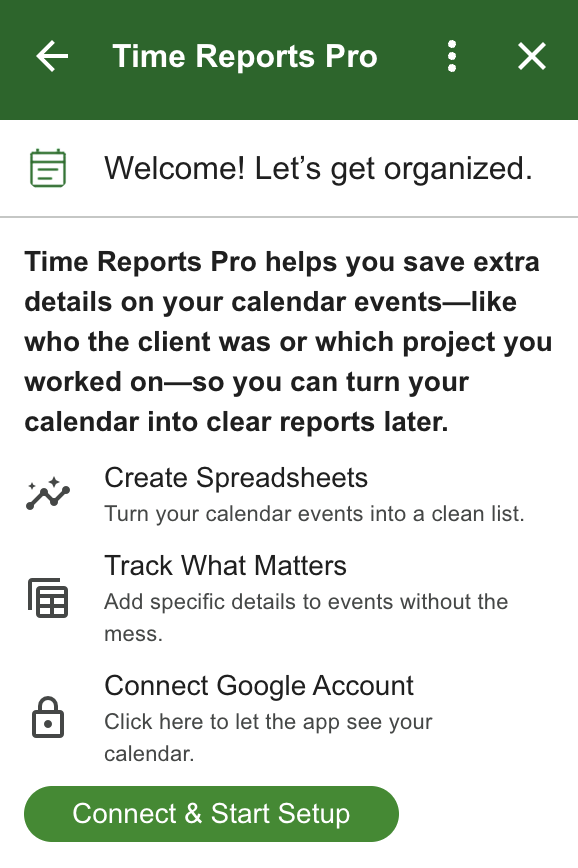
Once you click Connect and Start Setup, a pop-up window will appear requesting access to your Google Calendar. Click Allow to allow Time Reports Pro to make updates to your Google Calendar.
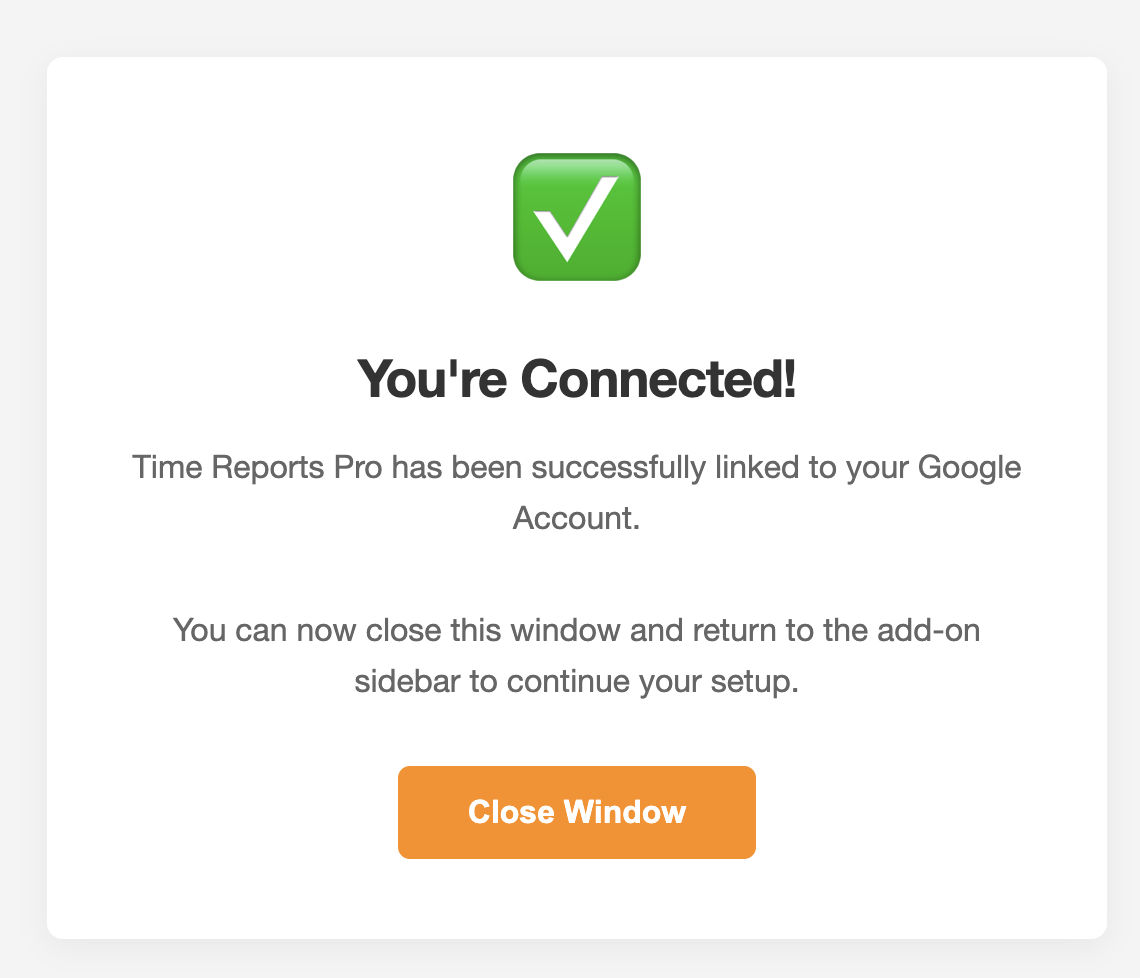
Once that is approved, you will see the below screen that you can close out of and return to Time Reports Pro.
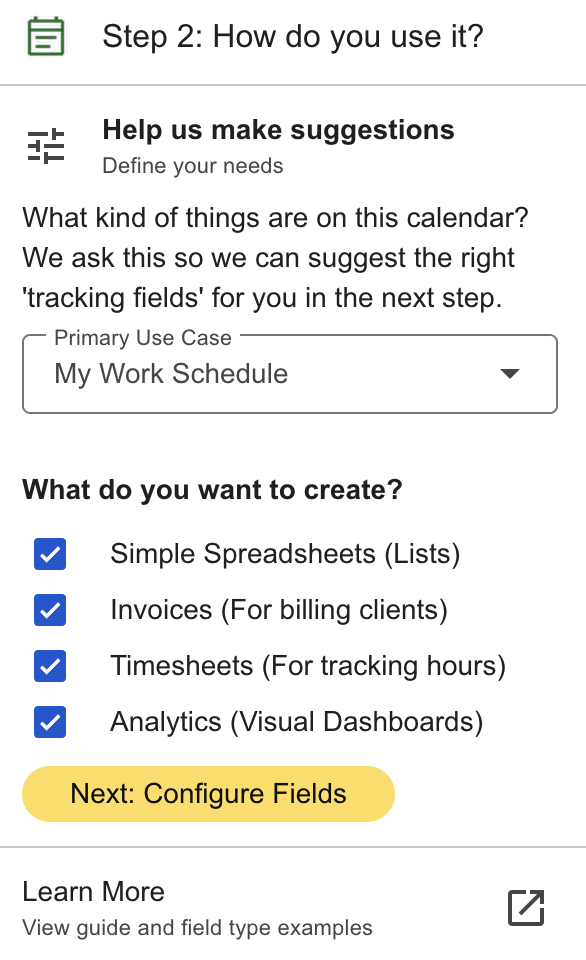
Step 3: Setup Calendar
1. Select a calendar from the Calendar List dropdown and click Continue. (Note: You an add more under Settings in the future!)

2. Help us help you by selecting the ways you will use Time Reports Pro. (Note: You can select as many as you want, we will just use this to clean up your screen by removing any features from the home card that you won’t use.)
3. IMPORTANT: This is the step that you will need to do to migrate your Time Reports fields! Click Advance and select the button by Migrate Legacy Data.
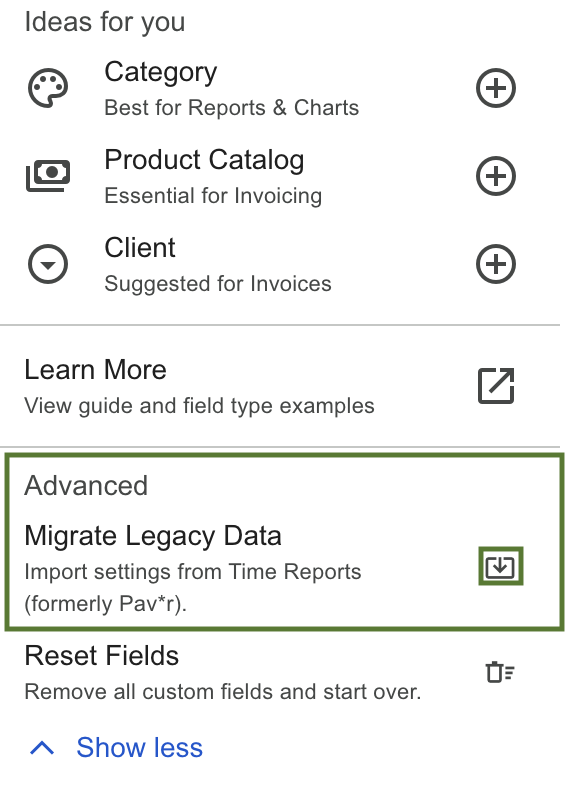
Once migrated, you will see a success message about how many fields were migrated. From there you can add additional fields, if you’d like, since there are more options in Time Reports Pro! To learn more about all the field options, View our Custom Fields guide.
4. Click Finish Setup