
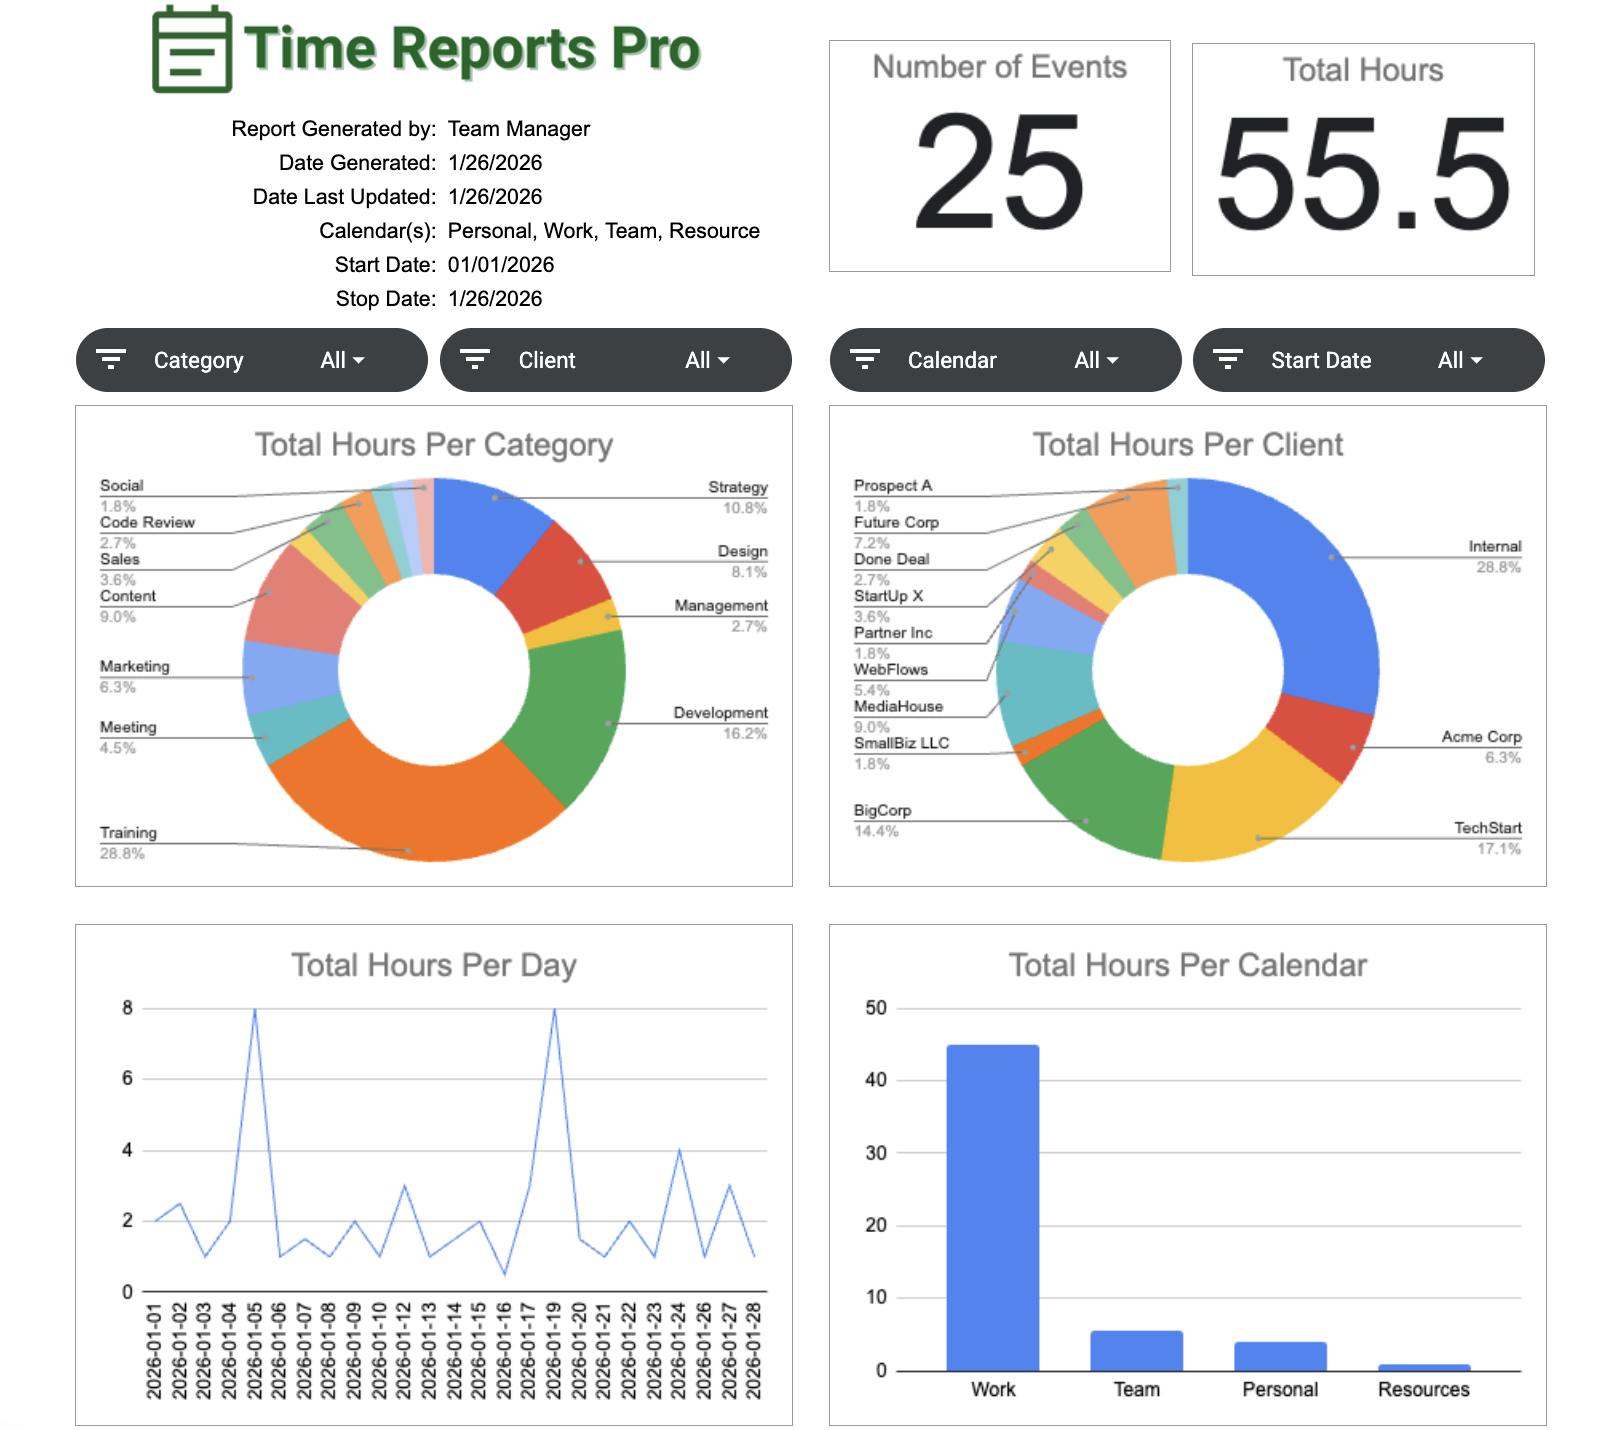
Visualize Your Time with Your Google Calendar™ Analytics Dashboard in Time Reports Pro
Turn your Google Calendar into a visual dashboard. Track time distribution, spot trends, and analyze productivity with beautiful charts.
Better Data = Better Graphs
The secret to a great dashboard is consistent data. If you type "Meeting" on Monday and "Mtg" on Tuesday, your charts will look messy.
To get the most out of the Analytics Dashboard, we recommend setting up specific Field Types before you run your first report.
Recommended Field Setup
Primary Category (Group By): Use a Dropdown or Color Field.
Why? These restrict options to a fixed list, ensuring your Pie Charts are clean and accurate.
Secondary Detail (Break Down By): Use a second Dropdown or a Text Field.
Why? This allows you to split your main category into smaller chunks (e.g., Client A > Phase 1 vs. Client A > Phase 2).
How to Build Your Analytics Dashboard
Follow this guide to generate your visual report.
1. Open Time Reports Pro and click Analytics Dashboard.
2. Select which calendars you want to analyze and click Next. (Note: You can mix your personal, team, and shared Google Calendars™ into this report.)

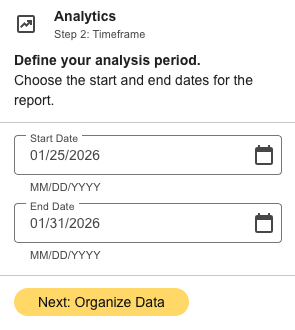
3. Enter the Date Range and click Next.
4. We will preselect what we think are the best fields for your report, but you can change them if you want to see something else. Click Generate Dashboard.

5. Click Open Dashboard to export your report to Google Sheets™.
FAQ’s
-
This means those events haven't been tagged with the specific field you chose to "Group By."
The Fix: Go back to your calendar grid, click the untagged events, and select a value in your custom Dropdown or Color field. Regenerate the report to see the update.
-
Yes. Since the dashboard is built in Google Sheets, you can go to File > Download > PDF to share a professional report with your team or stakeholders.
-
Yes! If you map "Group By" to "Event Color," we will generate charts based on the actual color codes you use in Google Calendar (e.g., Basil, Tomato, Peacock). This is the fastest way to get started if you haven't set up Custom Fields yet.